You can use Microsoft Word to create mail merges, using mailing lists downloaded from the database, to send emails or letters to large groups of volunteers or church contacts.
The following help pages from Microsoft give step by step guidance and helpful tips on creating mail merges:
If your list of recipients is in a password protected Excel file, you will need to have the Excel file open and have entered the password before you start creating your mail merge, in order to add your list.
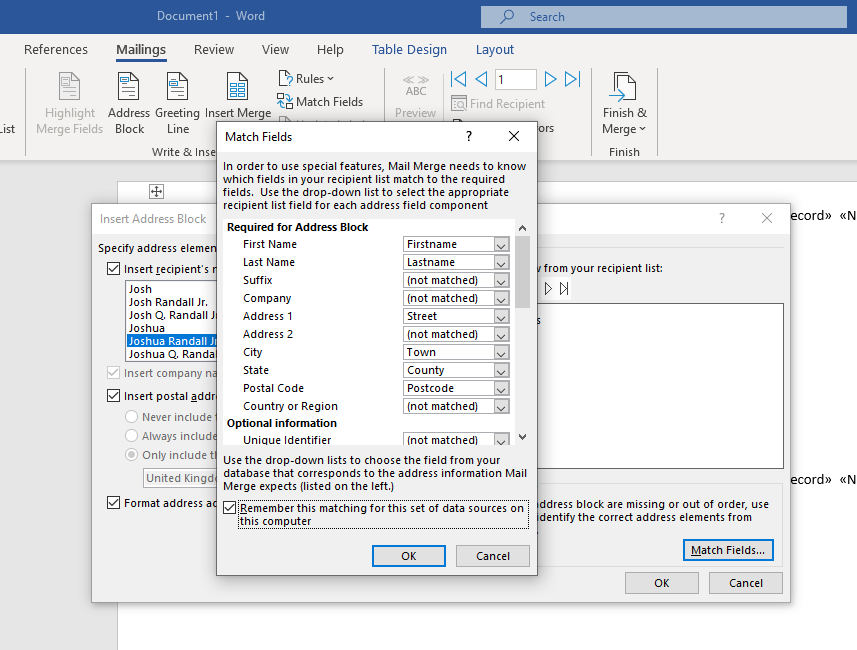
To create a letter or address label mail merge using a mailing list from the database, you will need to match the column headings on your mailing list with the corresponding Microsoft Word fields.
To do this, open the Address Block menu, then select Match Fields... The columns from your mailing list will be available to choose from in the drop-downs, you just need to match up the fields on the left with the options from your mailing list on the right. Tick the Remember this matching... box before pressing ok, to save you having to do this again for the same mailing list.
You can also use the mail merge feature to print address labels, see the video below for a run through of how to do this.
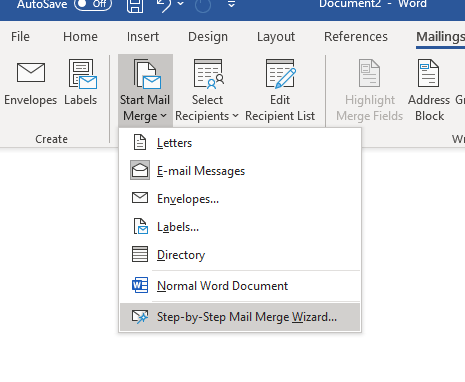
For a step by step run through of your mail merge, you can also use the Mail Merge Wizard, which will walk you through the necessary steps as you go. To do this, click on Start Mail Merge and then choose Step-by-Step Mail Merge Wizard and follow the instructions on screen.